Stuart's shed saw the Rejects gather to play a fictional battle set during the French Wars of Religion. Unfortunately, we were two players down with both Stuart and Steve unwell... get well soon boys!
You might want to check out Ray and Lee for their better photos and perspective of the game
Background
The Huguenot army
of Admiral Coligny has been operating in Normandy, but has found itself facing
a powerful Catholic force led by Tavannes.
In order to avoid an unequal fight, Coligny has retired south towards La
Rochelle and the relative safety of friendlier areas.
Unfortunately
for Coligny, he has been out-marched by Tavannes. The Huguenots have been caught before they
can make a juncture with the forces led by Condé that are moving from the south.
Without any alternative, Coligny turns to fight close to the small town
of Le Truc.
The Armies
With the battle set in 1569, that meant certain things needed to be taken into account. Unlike previous games set in the later wars, this one has the Huguenot army still using lance armed cavalry rather than the deeper formed sword and pistol cavalry.
The Catholic Army
Vanguard
4 units of gens d’armes (heavy cavalry)
1 unit of Argoulets (light cavalry that can either fire from
the saddle, or can dismount and be used as arqubusiers)
Main Battle
2 units of Swiss pike
4 units of French pike and shot
2 units of Enfants Perdus (skirmisher infantry)
1 artillery battery
Rearguard
3 units of gens d’armes
2 units of Swiss pike
2 units of Enfants Perdus
The Huguenot Army
Vanguard
2 units of gens d’armes (heavy cavalry)
2 units of chevaux-legers (medium cavalry)
Main Battle
1 unit of Landsknecht pike
3 units of Huguenot pike and shot
2 units of Enfants Perdus (skirmisher infantry)
1 artillery battery
Rearguard
1 unit of Reiters
1 unit of Huguenot pike and shot
1 unit of Landsknecht
3 units of arquebusiers (firearm only infantry)
Deployment
This was the instruction sent to the commanders of both sides prior to the day of the game.
"Commanders you must make deployment decisions
now!
On the map below you must decide in which 1 foot squares you
will deploy the 3 parts of your army.
One part (vanguard, main battle and rearguard) can go in any of the
numbered squares (1-6). Each square may
only contain ONE part of your army. When
you come to the table you will have the opportunity to arrange the units within
the squares.
Also, you must decide into which of the lettered squares
(A-D) you will place your army camp. This
will be positioned in the centre of the square.
Map
The hills are gentle and will not hinder movement, but do block line of
sight.
The farm can be occupied by one unit of skirmish
infantry. The fields about the farm have
hedges which may impede, and certainly provide soft cover. Cavalry cannot charge over any hedges.
The town of Le Truc may hold one infantry unit but not
cavalry or artillery."
Victory Conditions
The destruction of the fighting effectiveness of the opposition. This is done by inflicting melee defeats and
undermining morale in order to wear away the will of the enemy.
The plundering of an enemy camp contributes to undermining
enemy morale.
The army with the greatest loss of army morale points loses.
In the event of a draw the loss of commanders and/or the
camp will be given weighting.
Deployment
The Catholic commanders (Ray and Surjit) decided to place their vanguard in square 5, the main battle in 4 and the rearguard in square 3.
The Huguenot commanders (David and Lee) placed their vanguard in square 1, their main battle in 2 and the rearguard in 3.
At the table the players went through a deployment phase where they would use cards from their deck to bid to gain initiative to either deploy a portion of their army or force their opponent to do so. In doing so they would have to start making decisions about keeping high value event cards for the battle, or to gain some deployment advantage.
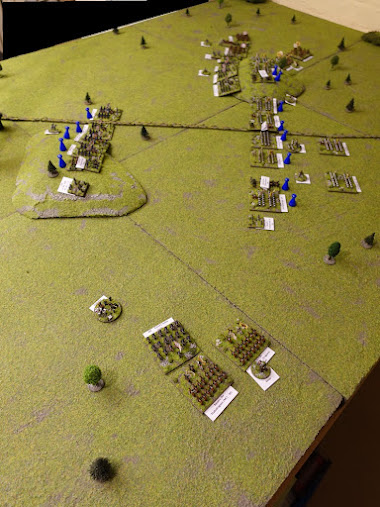
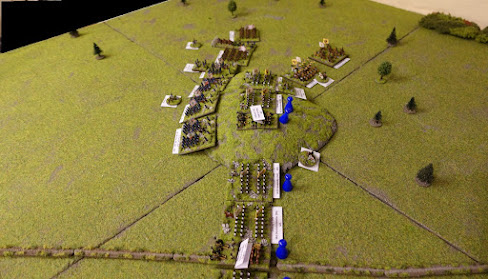
The result of the deployment is shown in the next photo.
 |
| The view of the Huguenot deployment from the town of Le Truc. |
 |
| The view along the Catholic line of deployment. |
The Battle
There was a considerable amount of early manoeuvring. For the Huguenots, their dilemma was to form a defensive position against superior numbers and an asymmetric deployment. For the Catholics, it was about trying to exploit their greater cavalry numbers on the flanks, whilst avoiding upsetting the good order and cohesion of their units.
note: basically, all units move straight ahead and are permitted one facing change during the move. However, a facing change means a cohesion test that may result in a drop in the unit cohesion level If not recovered, it could impact on firing, melee and morale.
 |
| The Catholic army moves forward and the Huguenots position themselves. |
 |
| The Catholic gens d'armes on the far flank continue to make quick progress. On the near flank, some repositioning is required while the Swiss pike continue to advance. |
 |
| With the near Catholic flank stalled in order to recover some lost cohesion, the centre and far cavalry advance. It is becoming clear that the cavalry commander is intending to turn the Huguenot right flank. |
 |
| The gens d'armes move further around the Huguenot right. The Protestant army, to counter the threat, is trying to extend its flank and moves a unit of Reiters to hopefully deter. |
 |
Perceiving a threat from the Catholic infantry in the centre, the Huguenot commanders move the main battle in what appears to be the first step to engaging the centre, or perhaps to limit their advance.
Whilst on the far flank the Catholics continue to inject a significant amount of nervous tension into their opponents, as the the weaker Huguenot rearguard try to counter the opposing gens d'armes laden vanguard. |
 |
| Now the Catholic gens d'armes turn to attack. |
 |
| And move into charge range... |
 |
| ... whilst moving into pistol range of the Reiters and arquebus range of the infantry, the Catholic heavy cavalry clearly intends to overwhelm the Reiters. |
 |
| The charge and melee is successful in throwing the Huguenot Reiters back. But, with both gens d'armes units failing to maintain discipline, they race after the stricken pistoliers. |
 |
The Reiters take more damage, leaving their morale undermined and the unit literally and metaphorically on the edge.
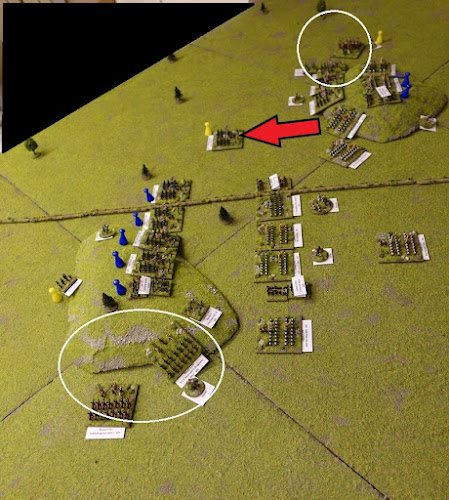
However, the charge, melee, pursuit and further melee has now left the gens d'armes exhausted, lacking cohesion and their horses blown. |
 |
And what is more, they are also out of command. If they Huguenots lost army morale points from the melee, the Catholics also lost one for having 25% of their units out of command. See the units circled in black.
But as one dramatic and violent event subsides, so another commences with Catholic cavalry and infantry applying more pressure to demolish the Huguenot flank. |
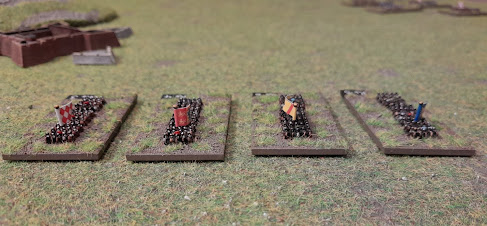
note: Each army has a number of poker chips to represent their army morale level. Losing melees and having morale undermined can lead to loss of a chip, but a morale level is also lost for every 25% of the army out of command radius. The army morale effectively continues the idea of cohesion being key. In this case the army's cohesion is being tested with so many units out of command.
 |
To everyone's surprise Conde appears at Le Truc with Huguenot reinforcements.
But has it arrived in time? |
 |
| Regardless, on the far flank the struggle continues with Catholic pike and shot and Swiss crashing into Protestant arquebusiers and gens d'armes doing likewise. |
 |
| Both Huguenot arquebusier units are ill-equipped to face such odds and are hurled back with their cohesion collapsing and their morale undermined. But as the gens d'armes pursue they crash into a Huguenot pike and shot unit. With another one close by, the commanders of the Protestant cause contemplate a little revenge. |
 |
| Conde's cavalry is now able to set forth to rescue the Huguenot right flank. However, despite being able to mass two pike units against one Catholic gens d'armes unit, sending it reeling back in disarray and killing the commander of the Catholic vanguard, it is ultimately too late. The Huguenots concede that the battle is lost. |
 |
| With a stand off on the near flank and in the centre, the engagement was decided by the actions on the far flank where the Huguenots were turned. |
ResultThe Catholics, who started with 11 army morale points, lost three - one because of 25% of the units being out of command; one for losing a melee; one for having a commander killed.
The Huguenots, who started with 9 army morale points, lost six - mostly from lost melees.
So, a Catholic victory confirmed... if it ever needed to be.
Analysis
This was, from my point of view, an interesting match. It was unbalanced, with the Huguenots at the disadvantage. What was clear to both sides was that the Catholic army had the better infantry and Huguenots the better quality cavalry.
From the Huguenot commanders' discussions at the start, I thought that they were going to trade space for time by withdrawing their right flank away from the cavalry and to make it less prone to turning. When they didn't do that I was a little surprised. The commander of the Catholic vanguard (Surjit) manoeuvred well and took advantage of this. Although in doing, he ultimately exhausted the vanguard and lost unit and vanguard cohesion.
By the Huguenots pushing their main battle forward, the advance of the Catholic main battle in the centre was stalled. This possibly reduced the ability of the the Catholic commanders to coordinate more fully against the Huguenot flank.
On the near flank, both sides were content to sit and stare at each other. The Huguenot cavalry could have bypassed the Swiss pike that positioned itself near the farm and attacked the inferior Catholic gens d'armes. But, would this have allowed the Swiss to then threaten the Huguenot centre? This was a difficult dilemma for the commander of the Protestant vanguard.
I have to consider that, as umpire, I was at fault. I had planned for Conde to arrive, but had not specified a particular turn, but wanted to judge their arrival to be timely but not immediately decisive or seemingly unfair. I think I might have brought them on a turn too late.
I was happy with the pre-game deployment and the use of bidding for the formation of the armies on the table.
I was also content that what I saw happening on the tabletop I could find examples and speak of in terms of historical events and parallels in the wars themselves. Something must be going right!
If I was to do this scenario again I might bring Conde's cavalry on earlier. Difficult to really know what changes to make as all players commented that they would make different deployment decisions, which would clearly alter the game.
Lastly... I think! I thoroughly enjoyed watching all players engage in a lot of head scratching as they negotiated multiple decision points throughout the game.


