Showing posts with label 6mm MDF. Show all posts

Monday, June 16, 2025

Rivoli at the Broadside Show 2025

Another year and another excellent Broadside Show.  This year the Rejects took the Battle of Rivoli to display.

The motley crew.  I'm sure some of these are on the police's most wanted list!

This post is mostly about the game.  I was umpiring and barely had a chance to step away from it all show.  For other excellent reports on the show and the game I refer you to fellow Rejects Lee's Broadside Wargames Show 2025: Show Photo Review and The Battle of Rivoli 1797 - Posties Rejects demo game at Broadside 2025 and Ray's Broadside 2025 - The Rejects on Tour - The Battle of Rivoli 1797.

Surjit carefully eyeing up the table and weighing his options.  Having led the Austrians to the Osteria Gorge twice and failed, he was determined to crack this toughest of nuts.

The Austrians advanced towards the Trombalore Heights threatening Joubert's troops deployed there.

French reinforcements start to arrive while Postie can't quite believe whatever he is seeing or hearing.

Surjit launches cavalry quickly up the gorge and clears the deployed artillery and turns to face the French light cavalry.  The Austrians have already got off to a better start.

To add to the Austrian joy, Vial's troops are being pushed back from San Marco.

Hoping to maintain pressure and hold the initiative, the Austrians rush to climb the gorge and gain access to the Rivoli plateau.

Meanwhile on the Trombalore Heights, Stuart outflanks the French defences and sends the 85th reeling off the heights.  The rest of the French position is looking precarious.

French army reserves are quickly required to form a new artillery line.

The Austrians throw cavalry into the fray.

With troops being thrown back from the heights and San Marco, the French command is trying to form a new line using reserves and Massena's arriving reinforcements.

Alas, the French guns stall the Austrians at the top of the gorge.  However, San Marco is clearly in the hands of the Imperial troops.

Caught in the act!  What sort of lunch break is this?  Ice cream guilt is written all over their faces.

The view over Rivoli shows the French beginning to form their defensive line on the plateau.  All the while, the heights are being heavily contested.

Uh oh!  Austrian troops led by Lusignan have arrived in the French rear.  Fortunately, Steve commanding Massena's division had two units to turn and face the unwelcome threat.

Massena's fresh troops steady the position at the foot of the Trombalore Heights.  With the front line units exhausted and approaching exhaustion, matters are finely balanced just as Surjit launches his best infantry at the French units trying to hold the plateau.

But with an established artillery line supported by steady infantry, the French were able to repulse the Austrian grenadiers.  With that disaster, the Austrian efforts to break out further onto the plateau ended in exhaustion.  With further French reinforcements due to arrive later, the game was called a French victory.

That was both the closest iteration and the one that most resembled the events of the actual battle.  Some slight tweaks improved the scenario and made it a game where the French really had to expend a lot of nervous energy and thought in holding off the Austrians.  Thoroughly enjoyable.

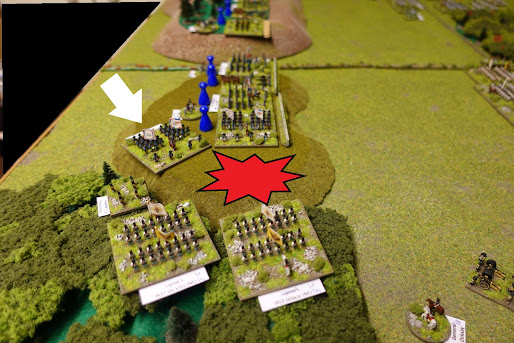
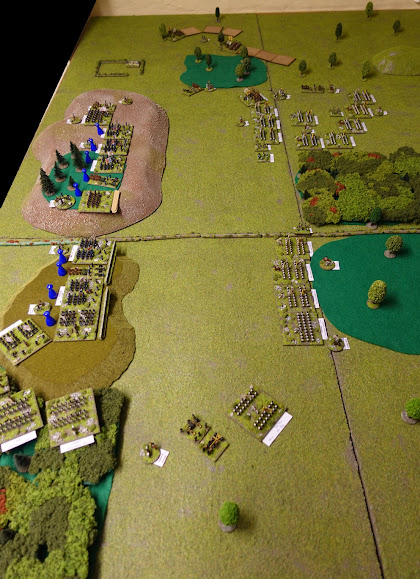
A lot of interest was shown in the game.  Especially in the 6mm MDF figures from Commission Figurines, and the 2mm buildings from Brigade Models.

With so much of my attention on the game, I barely saw much of the show.  Here are a couple of pics just to prove that I did have a quick wander around.  However, I didn't get the names of the games.


I really liked that the terrain was entirely from carpet tiles.

This one was using Lego.  I think it was called "Brickskrieg".

I also managed to come away from the show with some goodies.

I was actually given these by Postie in exchange for doing some future painting for him.

A couple of dice trays.

The rest were bought at the show's flea market.

Hussars to add to my 28mm Revolutionary Wars collection.

A box full of painted 15mm FPW. Mostly French and some Prussians.  I don't know which manufacturer. I will certainly have to rebase them.

All in all, an excellent day.  There seemed to be a lot of people there, including families and young couples.

Well done to the Milton Hundred Wargames Club on putting on another superb event.


Tuesday, March 18, 2025

The Battle of Castelnuovo del Garda, 16 January 1796 - AAR

It seemed a suitable time to put on a French Revolutionary Wars game using Volley and Bayonet rules and my 6mm MDF armies.

The engagement is a "what if" set piece battle set two days after the Battle of Rivoli.  Which in this alternative universe did not take place.

The Austrians have launched an attack to break the French siege of Mantua.  Once achieved and reinforced by the large number of troops there, they are to push the French westward towards Piedmont.

Hoping to hold Alvinczy’s Austrian forces at Rivoli, General Bonaparte and his divisions, nonetheless, failed to move quickly enough to reinforce Joubert who was guarding the approaches down the river Adige.  Consequently, Joubert was compelled to withdraw his troops south and rendezvous with the forces of Generals Massena and Rey.

Thus, Alvinczy was able to complete the junction of his three columns on the Rivoli plateau.  After a day’s rest, he set the Austrian army in motion south to defeat the revolutionary Army of Italy.  As he approached Castelnuovo del Garda, Alvinczy got news of the French beginning to deploy.

Bonaparte, now certain that the approaching Austrians represent the main strike towards Mantua – not the feint that Augereau is holding back around Verona - he is determined to strike a blow against Alvinczy at Castelnuovo del Garda.

The Players and Armies:
Austrians (6 divisions)
Generals Vukassovich and Luisignan – Dan
3 artillery, 3 regiments and 3 freicorps

General Quasdanovich – Steve
5 cavalry regiments and 5 infantry regiments

Generals Liptay, Koblos and Ocksay – Ray
10 infantry regiments

plus Colin, a late addition, who would share Ray's command.

French (8 divisions plus assets)
General Joubert – Lee
8 infantry and 1 cavalry plus 3 artillery

General Rey – Stuart
3 cavalry and 3 infantry regiments plus horse artillery

General Massena – Surjit
5 infantry and 2 cavalry regiments, 1 artillery

Battlefield and Deployment
The players had their army lists and some essential rules remainders sent out a week or two before the day of battle.  They were also forewarned about deployment.  In short, they had to follow these instructions:

1.  Choose one player from their side to reconnoitre the battlefield. They had 10 minutes to sketch the battlefield; observe the enemy forces and ask questions about the terrain.

2.  The sides reconvened and had 15 minutes max. to note on their sketch maps their deployment.

3.  the two sides then had 10 minutes to simultaneously deploy their troops.

4.  Both sides rolled 1d6.  The higher scoring side went first.

So, this is how it looked with the troops waiting to be deployed.

The French to the left, Austrians to the right.

View from the French side.

... and from the Austrian side.

And this is how the armies ended up facing each other.


The Battle
From the umpires point of view this was a very busy game.  After a year since last playing these rules, the Rejects needed to (rightly) ask lots of questions. They then proceeded to stress test the umpiring as well.  All that is said because in the second half of the game I just plain forgot to take any photos in the heat of battle.

Interestingly, neither side elected to deploy a reserve despite the big movement allowances in Volley and Bayonet.  At least one player would bemoan this omission at the end of the game.

French cavalry advancing.

Both approached each other cautiously.


The Austrians on the right quickly adopted a defensive posture while their cavalry sought to turn the far flank.


This gave the French cavalry an opportunity to start harassing the Austrian left flank.


Stuart has to turn General Rey's divisions to face the threat to their flank from Quasdanovich's cavalry.


Meanwhile, the Austrian left comes under attack.


However, the French first assaults are stalled as the cavalry is thrown back.


The attacked now become the attackers as they seek to drive away the threat to their flank.


Alas, this is going to be a desperate tussle on the flank that will eventually wear down both sides.  The French commanders now start throwing the rest of their line at the Austrians.


The battle on the far Austrian right is becoming increasingly isolated as Quasdanovich's and Rey's troops grind away at each other.


As we returned to the fray after lunch, the heat of the battle meant that my camera saw no more action.  So, I will try to finish the report as concisely as possible.

On the far flank (Austrian right, French Left) Stuart and Steve continued their own engagement.  Eventually, Quasdanovich was able to induce a morale collapse on d'Hilliers division.  However, the event took an immense effort.  Stuart's last division under, Duga, was also left exhausted.  But not before inflicting enough damage to the Austrians to leave Quasdanovich ineffective as an offensive force.

On the Austrian left, sterling defensive action by Grenadiers and desperate charges left the French assault ragged and ultimately exhausted.  Though the defenders were barely any better themselves.  In the centre, the French attacks were repeatedly repulsed as the luck and valour ebbed and flowed.  In the end, the French centre was in some disarray.

So it was that the French saw two divisions exhausted and another two suffering from morale collapse.  Meanwhile the Austrian army ended with two exhausted divisions and one in collapse.

I called it a minor victory for the Austrians.  Though, on reflection, the reality of the situation was that both armies had fought themselves to exhaustion.

Afterthoughts
That was a busy and action filled game.  However, both sides were struggling with their dice rolling for most of the battle.  This possibly meant that the game was less decisive in its outcome than it might have been.  To give an example, Quasdanovich had four units onto one French.  He had 16 dice to roll and needed sixes.  He rolled and not one six!  This absence of sixes was repeated across the table for much of the game.

The pre-game "stuff" worked well and gave an initial momentum and urgency.  Plus, it was fun to see the results of faulty reconnaissance.  For example, the Austrians failed to see that the French had cavalry and based part of their deployment on that "fact" which explained their exposed left flank.

After the game, one of the Austrian commanders made the observation that they should have kept the cavalry in reserve and ready to move to wherever needed.  I think that he felt the desperation of trying to keep the flank with only the one line of troops.

Whether it was fun or challenging to play I will leave to Ray and Lee to comment in their blog reports.  I was exhausted like many of the units, but satisfied that the game was close and ebbed and flowed, and that I had not made any significant errors.


Wednesday, March 6, 2024

The Battle of Fraise - Part 2 the AAR

Ray, Steve and a number of Reject Zoom groupies got together to witness the first campaign battle just west of the town of Fraise.  See here for introduction.

For your information, the figures are 6mm MDF from Commission Figurines and the rules being used are Volley and Bayonet. 

Steve (French) as Augereau was defending the road in prepared positions.  Ray as Wurmser and Lee (Argenteau) were entering from the east.

Augereau had three infantry and one cavalry division at his disposal.  The Austrians had a considerable force of six infantry divisions and one cavalry division.  Plus, there were other troops arriving later in the day from further afield.

The French deployed on the hills straddling the road and their line of communications.  Most of the infantry being either behind earthworks or in the light woods.  Their cavalry was deployed further forward on the French left.


walls and lolly pop sticks making up for my lack of appropriate scenery.

The first turn was 12:00 noon.  Daylight was going to end by 21:00.  So, the players had the potential for 9 turns, each turn representing 1 hour.  Movement is big in Volley and Bayonet to reflect the time and ground scale, and the grand tactical nature of the ruleset.

Apologies for lack of early snaps.  However, in short, The Austrians drove their cavalry division of hussars up the road and sharply north to take a position on the right flank (facing the French left).  The French mounted responded quickly by charging the 30th Wurmser Regt.

Chasseurs a Cheval and Dragoons contact the near Austrian hussars.

Weight of numbers wiped out the hussars.  But dice rolling was good on both sides (this seemed to be a feature of the game), thus the Chasseurs were dispersed.


Meanwhile, Wurmser (Ray) painstakingly begun the process of advancing his infantry along the road and through the light woods in order to deploy for the hoped for decisive assault.


Augereau's infantry remain stationary and prepared in their defences.  The Austrian's may be moving, but the clock is ticking down all the time.


Wurmser's last hussar regiment is launched at the French dragoons. 


Luck is blessing both sides!  The dragoons are swept from the field.  However, the exertion has neutralised the hussars as force.


Augereau (Steve) pulls his remaining heavy cavalry and skirmish cavalry back to the relative safety of the hill.


Tick... tick... tick.  Wurmser's (Ray) and then Argenteau's (Lee, who unfortunately could not be present) infantry continue to trudge through the inconvenient terrain.  But slowly, the Austrians are deploying while the French watch and wait.


The Austrians are clearly concerned to avoid getting into French artillery range too soon.  However, they do take the opportunity to extend their line south in order to start overlapping the French, and swing a battery forward to engage against the 14th line, which does not enjoy the advantage of  being behind field works.


Tick... tick... tick.  More and more, the Austrians are getting into position.  But, the sun is dipping in the sky.
Some late arriving cavalry appears.  Wurmser decides to keep them in march column.

Cavalry in column can just be seen in the bottom right corner.

Cautious Wurmser (Ray) now starts to show some aggression.  Moving swiftly, he sends freikorps and two regiments into the heavy woods on the French right flank.  From the east the cavalry is emerging from the light woods and can gather some momentum.


Cavalry in column emerging from the woods.  Note the bases to reflect that they are in march column and that this is the length of that column's tail.

After slow progress through the woods (nearly an hour in tabletop battle time), Austrian infantry prepares to deliver volleys in support of grenadiers charging up the hill against the French 14th line.


Having put up a good and very close fight, the French regiment is forced to retire in disorder.  This leaves the grenadiers able to take the position and face the French right flank.  It's looking a little grim for Augereau (Steve).


Meanwhile, to the north the Austrian cavalry sprints forward and round to position themselves on the French left flank.


But the French commander is not going to let the Austrians have it all their own way.  Taking the opportunity to recover from disorder, the 14th is moved forward to re-engage.  Plus, the French flank turns to face the grenadiers.  The volley fire from both being devastating (I said the dice rolling on both sides was good) and wiping out the Austrian shock troops.  Perhaps this flank is not folding without a fight.


However, Augereau (Steve) seeing that Wurmser (Ray) was now in a position to assault both frontally and on each flank decided to play the long game and withdraw leaving the field to the Austrians.

The final positions before French withdrawal.

But... the French cannot withdraw without the possibility of an Austrian pursuit taking place.  

In the campaign, each side has a number of light cavalry (LC) points allocated across their corps and divisions.  This is an abstraction to enable strategic operations like scouting, and to be used as pursuit. They do not appear in battles.  Each side totals their LC points present.  If the winner has more they roll that number of d6.  Sixes cause a loss of one strength point off whichever division the loser uses as a rear guard.  Ray rolled extremely well and caused 5 strength points of casualties.

Analysis/Conclusions
Ray had two turns of the game left.  In Volley and Bayonet terms this is plenty of opportunity to cause an awful lot of damage.  Especially when considering that Ray was ready to engage/charge on each flank and along the whole French line.  Nonetheless, it's not a lot of wriggle room.

The woods held up Ray's deployment, but it was a great lesson learned about deploying from a road.  Plus, the woods which held up Ray also protected his troops from being harassed by the defenders as they arrived.  In short, the terrain permitted Ray to mass his infantry and bring them forward.  The only potential negative is having to march against the clock.

One has to wonder about holding a static position.  However, Steve was grossly outnumbered.  Given time, the Austrians were always going to be able to envelope the French.

I guess there was not a lot of combat, but it was an intriguing game of movement that led to a victory by one side manoeuvring the other out of their position.  I would imagine that a lot of generals would accept that sort of victory gained with little loss. 

Everyone seemed happy with the play, the rules and how the campaign translated onto the table top battle.

Seven turns completed in about 3 and a half hours.  I'm happy with that.

Now to administer the French strategic retreat and prepare for the next strategic moves on the map.

Happy Days!


Most Popular Posts