Showing posts with label 6mm. Show all posts

Saturday, November 15, 2025

The Battle of Vingt-Zwanzig

Whilst taking advantage of my better half being out on Saturday morning, Surjit and I got together via Zoom for a mid 18th century clash between Austrian and French forces.  This was entirely an entirely fictional engagement. 

I've been working on army lists to use with Koenig Krieg (Hex Version) based loosely on those in Age of Reason rules.  For this encounter, both Surjit and I constructed 20 point armies.

The armies deployed.

Surjit played the French, while I commanded the Austrians.

Both of us adopted fairly standard deployments with cavalry on the wings.  Each holding a cavalry brigade in reserve.

The Austrians quickly threw their cavalry wings forward.  Perhaps trusting in their superior weight and morale.

The southern flank saw the first big cavalry clash.  One of the Austrian cuirassiers had taken a lot of fire from French infantry and artillery.

Nonetheless, the French horsemen were forced to retire.  Unfortunately for the Austrian heavies, they had only inflicted light casualties on their Gallic counterparts and would be back.

Meanwhile, on the northern flank, the Austrian cavalry commander had been too impetuous and left an exposed flank which the French dragoons were all too happy to fall upon.

Sweeping away one cuirassier unit, the dragoons then ploughed into the next.

Within moments the cream of Austrian horsemanship had been dispersed.  However, the successes of the dragoons left them out of control in the pursuit. 

Just a photo to show the battle lines.
In the centre, Croats and Chasseurs a Pied contested the ground.  All the while both lines slowly crept forward while exchanging artillery fire.

The cavalry clashes made the flanks uncertain for both sides.
On the Austrian left, the cuirassier brigade swung in to threaten the French infantry line.
On the right, both sides started bringing reserves out to continue the contest on that flank.

On the Austrian left (southern flank), the French cavalry rallied and returned to the fray to challenge the Teutonic horse and protect the infantry. The centre continued to close and inflict artillery casualties on each other.

In the north (Austrian right), reserve cavalry from both sides swiftly crossed the field in a fierce charge.  

The Austrian reserve cavalry wrought great carnage on the French horse.  Following through quickly, they attempted to run down a grenadier unit, but were halted by their controlled and effective musketry.
Nonetheless, the French commander was now feeling some anxiety about his left flank.

However, the south flank saw a complete and catastrophic reversal for the Austrians.  With one cuirassier unit destroyed and the other retreating in disarray, the French proceeded to induce a similar anxiety in the Austrian commander.

Result
With both flanks in danger, we ran out of time and called a halt.  We were happy to call this a draw.

Afterthoughts
This was a thoroughly entertaining couple of hours. A lot of fun.  Koenig Krieg remains my personal "go to" rules. for the 18th century.

This was a narrower table than I would usually use.  However, it had the virtue of getting us into action from the start - no cautious manoeuvring for ages before any contact.

As for the army lists - so far, so good.


Tuesday, September 16, 2025

WW1 Planes for Postie

A bit of a diversion.  Postie (Stuart) kindly gave me two boxes of Warlord Games landsknechts.  In return, I offered to do a little painting for him.  I expected to be working on some medieval knights, as I have done in the past. But no! Instead, he gave me World War One planes to do.

These ones are all circa 1914 to be used with his early war rules. 

All planes appear to be 1/300th scale.  Not sure of the manufacturer.

From left to right, starting at the top:
French Moraine-Saulnier N x2
German DFW B1, Taube monoplane
British Moraine monoplane, FE2b


My favourite is the Taube.  It's funny how the thinking was "if a bird flies, make the plane look like a bird."

The following are for later in the war.

Top row is 3 crashed planes: British, German and Turkish.
Bottom row: British Bristol F2A, British Sopwith Pup, German Fokker DR1 and German Fokker E111.


All in all, I got my box of Landsknechts very cheaply.

Now, I can get the paint brushes back into Renaissance mode.


Sunday, September 7, 2025

Hex Adapted Koenig Krieg... Again!

In a slight diversion, I decided to revisit my favourite set of mid 18th century warfare rules and slightly amend my attempt to adapt Koenig Krieg rules to play on hexes.  See here for the first trial:  Koenig Krieg Variation Takes Shape!

From the original trial - 3 years ago - I only changed the position of units so they face a vertex of the hexagon instead of a side.  This is to more clearly define the front, flanks and rear of units.  I also introduced a limited amount of unit stacking.  More on that later.

With those things in mind, Steve and Dan joined me in a limited test game.  It was quite simple, Austrians and French marching towards each other.  Similar sized forces, though the French had more cavalry and the Austrians more infantry.

Each infantry brigade also contained a light gun.  The Austrian infantry units were larger.  However, their morale was no better than the French ones.  All units started in column.

Koenig Krieg is a game of actions.  In an action a unit can choose to one of the following: move 2 hexes, change facing/formation, backstep 1 hex or fire.  Typically, an infantry unit in line has one action; a cavalry in line has 2 actions.  The rules allow for the Prussian infantry to get extra movement but I don't tend to play this.

The Austrian columns advance.

The French brigades make their way forward.

Both sides advance towards each other.  The Austrians, Dan, being keen to anchor their flanks on the towns.  The French, Steve, looking to work his cavalry around those flanks.

On the southern flank, the Austrian cavalry quickly advance to check any French flanking movement there.  However, the French dragoons have quickly positioned themselves to catch some infantry in column and prevent the Austrians getting to the town.

In Koenig Krieg, movement and shooting takes place in the Action Phase.  This is then followed by a charge and melee phase.  If initiative can be controlled it can give the controlling side some benefit.  For example, it might allow an infantry in column to change formation in anticipation of an enemy charge.

Regardless of the phase, controlling initiative is important in either acting first or forcing the opponent to act.

Austrian cuirassiers give the French heavies a lesson.  Forcing them to retreat in haste.  However, they are not destroyed and may return to cause problems.

On the northern flank, the French dragoons catch the Austrian columns who run in disarray.

In melee, there are dice modifiers.  Not just additions and subtractions but also multipliers.  One multiplier is x2 when charging a flank or rear; another is x0 if caught in column.  Amongst others, these simple mechanisms mean that playing to the period of linear warfare and protecting flanks is advantageous.

One French dragoon exploits the situation to pursue on of the retiring columns.

While the other, crashes into the flank of the Austrian line.

After the melee phase, there is an exploitation phase.  This is where victorious charging units can redress their facing and/or continue their charging.  For cavalry, this is risky as they could become uncontrolled and race off the table!

Unable to recover from the flank attack, the Empress' infantry retreats...

... but is followed...

...and destroyed.  As were the two units in column.  This was not good news for Dan.

However, the Austrian cavalry was now on the exposed French southern flank.  Plus, the French had three units in retreat and their dragoons were out of command.  So, despite the Austrians losing 3 units, the battle was still in the balance.

Command and control is simple but works.  When a unit is out of command it must pass a dice roll to move (1-4 for cavalry; 1-2 for infantry and artillery).  So, once the lines engage and retreats occur, command and control friction is quickly introduced to the game.

The Austrian line advances into charge range of the French infantry.  Partly to engage; partly to put distance between themselves and the dragoons in their rear.

On the northern flank, the French infantry were able to overlap the Austrians with both frontal and flank attacks.  Now you see it!

...now you don't!

However, the rest of the Austrian line held.

Throwing back one French charge and destroying another French infantry regiment.

But on the northern flank, the French exploited their success and wiped out what was left of a brigade.

The Austrians passed an army test to remain.  However, time was called on the game.  Both players agreed to a draw.

Afterthoughts
We were all pleased with the game and how the rules worked with the adaptations for use on hexes.  In fact, it gave a very enjoyable game that flowed smoothly.

The Austrians had lost 5 out of 10 units.  The French had lost 2 out of 10 units.  However, one French cavalry was still in retreat, as were 2 infantry - both of whom had been severely mauled.

Interestingly, despite being able to stack infantry neither player chose to.  I have to confess to preferring the single lines.  I may just remove the stacking.  It gave little advantage anyway, other than preventing massive breakthroughs after a melee.

I will now reflect on how it played out.  At the moment, the only thing that I would change is the determination of victory.  In Koenig Krieg, it's based on a dice roll at the end of every 4th turn.  Getting more difficult with increasing losses.  I think this allowed the Austrians to take more losses than seemed likely.  I'm considering moving to a countdown system - something like having a number (say half the number of units) and minus 1 point for each destroyed unit and minus 1 when a brigade reaches half strength.  I'll ponder on that.

A question.  I see conflicting accounts of the use of squares in this period (1740 to 1786).  The rules allow it, and I know that the Austrians used massed squares against the Ottomans.  What are your thoughts.  Should infantry squares be part of 18th century European tabletop games?


Tuesday, November 5, 2024

The Battle of Litchfield - AAR

A gaggle of Rejects assembled in the Shed of War at Lee's behest to fight a "what if" scenario on the Battle of Bosworth. What follows is the briefing from Lee.

"What if Richard’s spy network had been slightly better informed about the intentions of the Stanleys and the route of Henry Tudor's march towards the midlands? Richard was not a timid commander and had shown his willingness to take the initiative in the campaigns he had fought on behalf of his brother, Edward IV. Would Richard have seen an opportunity to stop the Stanleys from formalising their support for Henry by catching the much smaller Lancastrian army a few days earlier than happened historically?
In today's game, Richard III’s army left Leichester as soon as Northumberland and his Array arrived. The combined army camp at Ambion Hill while the King considered his options. The ridge of high ground from Ambion hill to Stoke Golding crosses Henry's route. It is a good defensive position, but the flat lowlands are marshy and limit space for his swollen army to exploit their numbers. Richard also knows that the Stanleys are shadowing Henry and despite the King's demands for loyalty, he cannot be entirely certain of their allegiance. So he decides to attack Henry before he can join forces with the Stanleys. If the army presses on now they can resupply at Atherston and catch Henry at Litchfield in two days time.
Meanwhile, Henry has been conversing with the Stanleys and plans to meet at Litchfield to formalise their agreement. The Stanley's army is about a day march to the North East but William and Thomas Stanley, and their household troops, divert to the town to meet Henry Tudor. This is when news of the advancing Yorkist army is received. Henry’s army is outnumbered and Sir William Stanley is forced to decide to defend his Son-on-Law. He sends a rider to bring the rest of his army, knowing they will probably arrive too late to change the outcome. Henry’s most experienced commander, Oxford has just enough time to deploy the army on a ridge crossing the road to Litchfield and orders his archers and crossbowmen to prepare hasty defences."

Rules: Test of Resolve
Figures: 6mm Baccus
Lancastrian Players:  Colin, Ray and Stuart
Yorkist Players:  Steve, Surjit and me.

The opening dispositions.  The larger Yorkist army is on the left.  The smaller Lancastrian army deployed on the hill.

Lee presiding over the game

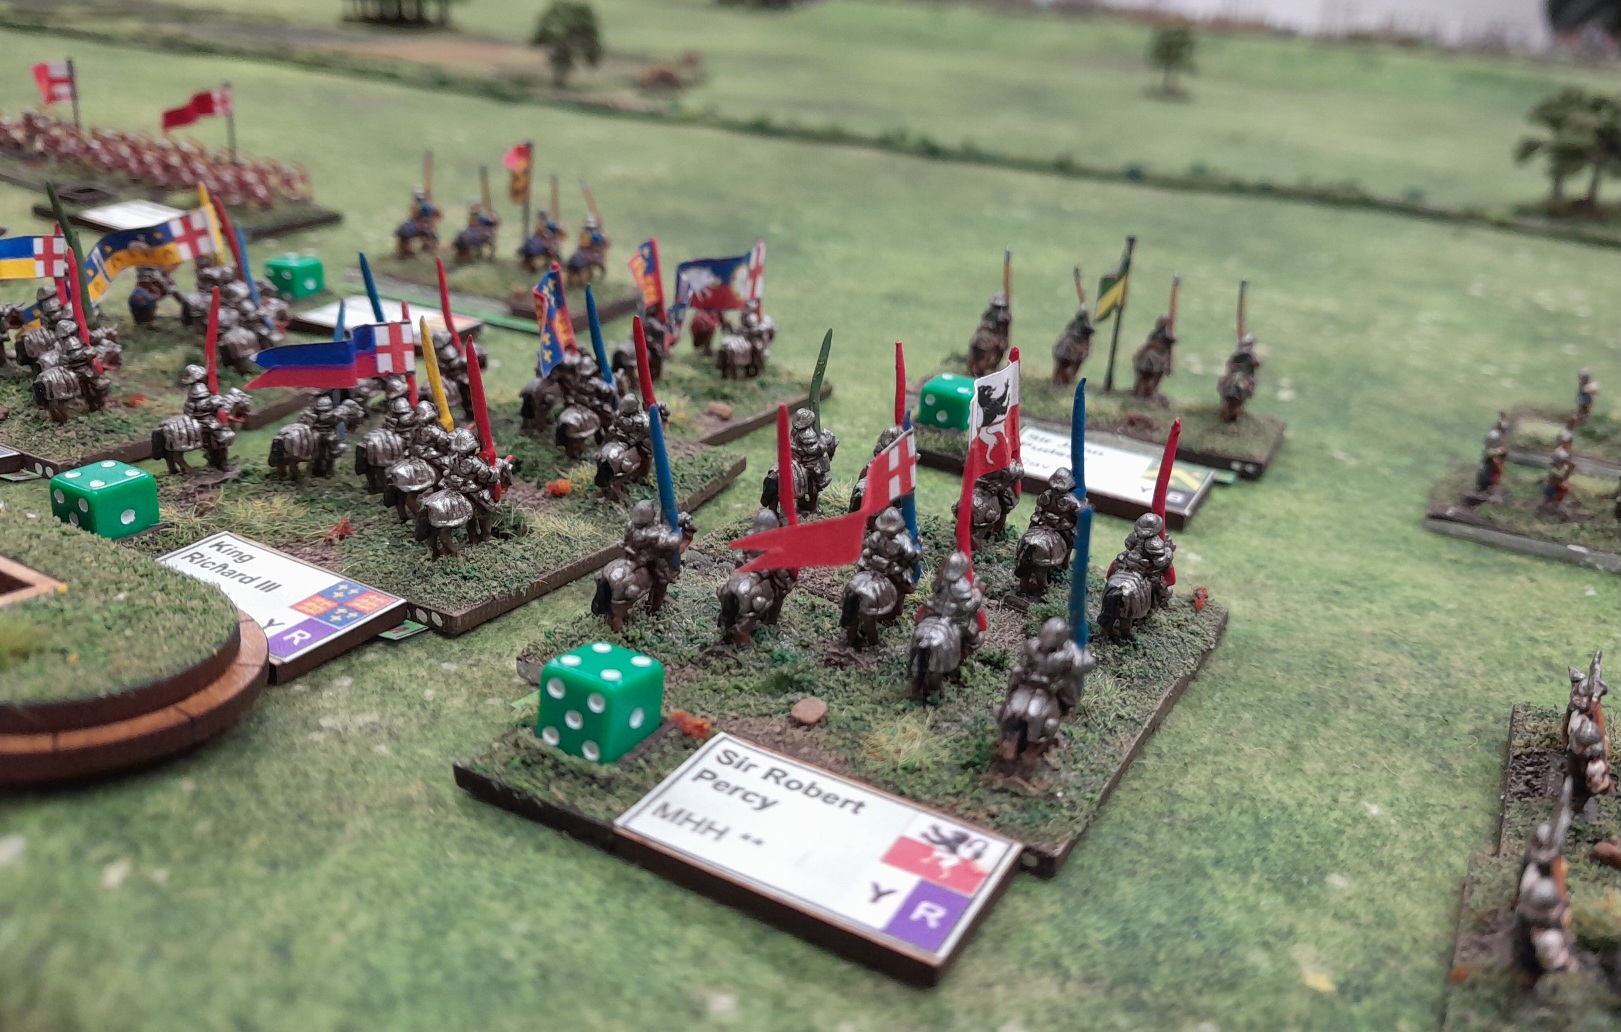
Yorkist knights bracing themselves for battle.

The Yorkist army advances to the stream where the muddy banks provide a small impediment to their progress towards Henry Tudor's force.

Surjit, controlling Norfolk's battle, advances faster than the rest of the army and begins organising his approach against the Lancastrian left.  Norfolk would end up playing the major role in defining the outcome of the engagement.

The Yorkist line now advance beyond the stream.  Not quite in shooting distance yet!

Norfolk (nearest to us) has begun shooting from the town whilst retinue bill and array position themselves to attack the hastily prepared positions of the Lancastrians.

A view from Norfolks position by the village towards Henry Tudor's position.

Two companies of array bound up the hill to sweep the defending archers away...

... only to find themselves swept away!

As the rest of the Yorkist line creeps forward, Norfolk is not deterred and launches troops up the hill once more.


This time Norfolk destroys the archers and can now be classed as on the hill.  However, there are two units of nasty looking mercenary pikemen ready to counterattack.

The rest of the Yorkist line now have the range to shoot.  Some effective shooting takes place, and is returned from the defenders.

The mercenary pike charge in.  However, the fighting is hard from all and they fail to eject Norfolk from the hill.

One pike unit is destroyed and the second is caught up in a long struggle.  It is beginning to look like the Lancastrian flank is creaking under the strain.

Along the whole line, the Lancastrians are putting up a stubborn defence as the Yorkists hurl themselves up the slope.

Norfolk finally eliminates the last of the pike.  The Lancastrian left flank has been turned.  The situation for the Henry Tudor has gone from bleak to grave.

However, Yorkist impetuosity in charging their royal knights against Henry's has stalled.  With the Lancastrian knights now trying to chase down Richard himself and his company of knights.  This could mark a dramatic turn of fortune in the battle!

Meanwhile, the whole Lancastrian left flank have had enough and have fled the field.

Fortune favours the Yorkists.  The Lancastrian knights fail to destroy Richard and his knights.  With this failure and the complete collapse of the left half his army, Henry Tudor calls it a day and retires from the field while he can.

A Yorkist victory!

That was a fantastic game.  The card driven nature of the actions made for a delightfully unpredictable game.  Which, if played again, could easily produce a very different result.  In general, the cards in the first half of the game favoured the Lancastrians, which was when they needed them least.  Then favoured the Yorkist in the second half, when they needed it most.

The combat was hard fought with a lot of melees going on for multiple rounds.  No bad thing bearing in mind the nature of the warfare in this period.

Lee did a great job in preparing and executing this scenario.  His umpiring was fair and patient (a special trait required for dealing with the Rejects in the shed).  However, he looked exhausted by the end.

A thoroughly enjoyable game.  I hope that Lee puts on more Test of Resolve games.


Most Popular Posts