Tuesday, January 31, 2023

Battle of Montebello, 20 May 1859 - AAR Part 1

The excellent Jonathan of Palouse Wargaming Journal fame, hosted the Rejects in a remote game of the Battle of Montebello from the  Franco-Austrian War of 1859.

This will now take more than one sitting.  Rather than one very long report, I thought that I'd split it in two.  So here is Part 1.

As usual the preparations were impeccable.  Jonathan had been asked to increase the fog of war and he certainly did a great job of that.

Background

In short, and using part of Jonathan's briefing:

"On 9 May, Austrian FZM Gyulai’s uninspired offensive in Piedmont ground to a halt without ever contacting the enemy.  Concerned that the French would attempt to turn his left flank by advancing upon Piacenza, FML Stadion’s V Corps was ordered (20 May) across the Sesia River and move on Casteggio and Voghera. This reconnaissance-in-force was determined to discover French dispositions, interdict the Voghera-Piacenza Road, and thwart these perceived threats.  As the Austrians approached Casteggio, they ran into Sardinian cavalry screens. The Sardinian mission, deployed east of

Voghera, was to act as an early warning system to prevent surprise attacks from the Austrians. The Sardinian light cavalry were to hinder any enemy movements westward buying time for the French army to come up, if needed. The only means of crossing the River Coppa in this area are via two bridges: the bridge at Casteggio and the railroad bridge to the north of that town. Running from Genestrello north, the Fossa Gazzo can be crossed everywhere but with difficulty. The railroad bridge at Casina Nuova and the bridge near Genestrello are the best places to cross the Fossa Gazzo."

The Austrians pushed on to Genestrello and Montebello.  The French arriving from the west now took up the fight.

This was the photo of the battlefield that Jonathan supplied.  The Austrians and Sardinians are there somewhere.  This induced a wonderful level of uncertainty and surprise.


Sides

The Austrian army were commanded by Lee, Steve and David.

The French/Sardinian force were controlled by me, Ray and Surjit


Victory conditions

There were different conditions for each side.  Neither were made aware of the other's 

Rules: amended Fields of Honor on a grid

Figures: 15mm

Victory Conditions: Assessed at the end of the battle based upon army objectives.

Break Points assessed at Brigade level. No Army Breakpoint Sudden Death.


The Battle

This was to be our first sight of the table occupied with troops.

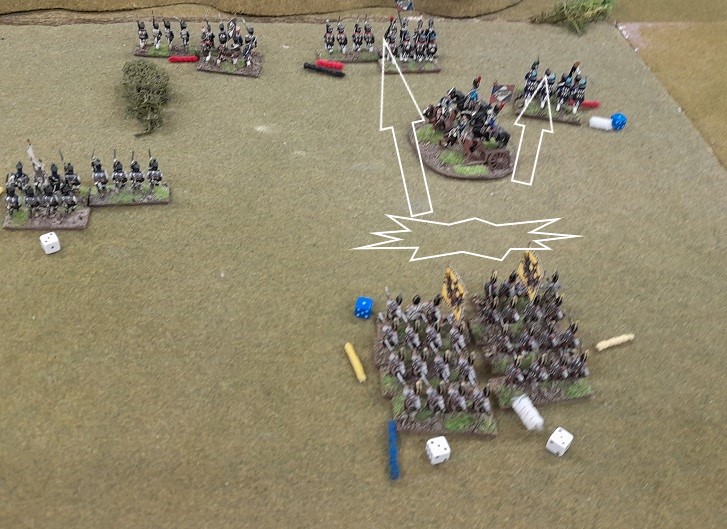
This first screen shot is from the northern end facing south.  The scattered Sardinian cavalry can be seen milling around.  


This second image is from the south facing north.  This shows the Austrians in occupation of the towns along the Piacenza road.


With the Sardinian cavalry commander (me) not quite knowing what to do other than get in the way, he put all onto reserve orders.

Meanwhile, Beuret's brigade arrived from the west along the road just as the Austrian's positioned themselves more aggressively in the centre.


In the north, Austrian reinforcements arrived around Lungavilla and from the north-east along the road.  Looks like it could be a bit of a squeeze for the Sardinians!


The Austrian commanders were doing a good job in pushing forward and hemming the arriving French in place, and in reducing the Sardinian cavalry.


And with the reinforcements spreading out from Lungavilla, both the cavalry and Blanchard's brigade arriving along the railway line looked to be facing a dire situation.


Meanwhile, in the south Beuret's brigade saw multiple assaults against Genestrello and the Austrians around it repulsed.  This was not looking promising for the French.


However, the commander of Blanchard's brigade (Ray) injected some "furia francese" into the proceedings (with the help of good initiative and dice rolls) by pushing back at the Austrians in the centre on the railway track.


Alas, by this point Beuret had another assault checked at Genestrello and the Sardinian cavalry in the north had been annihilated (my poor handling and dice).  The Austrian's were playing well and aggressively.


Then, an odd initiative call by the Austrians left their centre vulnerable by not deploying their infantry in column and leaving some artillery exposed.  Blanchard was keen to take advantage of this moment of Austrian madness, and promptly destroyed one unit, 2 artillery batteries and sent another infantry unit reeling back.

view from the south looking north


view from the north looking south

With the Austrian centre pushed back, The French now had more space.  

Beuret, inspired by the French show of arms, took the fight back to Genestrello... and took it.

However, with Austrian reserves continuing to arrive they were able to form a line from Montebello to Lungavilla.


After four and a half hours of fighting, we called it a night and agreed to meet again next week to complete the battle.

In order to maintain the fog of war, we all agreed to not receive updates, maps showing unit positions or casualty rosters.

From a very shaky start by the French and good moves from the Austrian, everything was now to play for.

No analysis yet.  That would give too much information to the enemy... shussssh!

Wednesday, January 25, 2023

The Battle of Abensberg, 23 April 1809 - Battle Report

The first physical gathering of the Rejects in Postie's shed of war in 2023 saw us duel in a Napoleonic encounter between the French and the Austrians.  For a much better report than this one go to Big Lee's blog.

I don't have the army lists. However, it would be fair to say that the armies mirrored each other in terms of units.  But, the French had several elite infantry units while the Austrians enjoyed heavier and slightly better cavalry.

For the French were Surjit, Lee and Mark.

For the Austrians were David, Ray and me.

My first analysis of this game was that the symmetric nature of the armies made what should have been a fairly quick game turn into a cagey affair with neither side wanting to commit themselves to risks.  So, the first few turns I'll skip past, as the action really took place in the last 90 minutes out of a five and a half hour game.

The forces deployed.  Both armies with cavalry on both flanks and infantry in the centre.

Closer view of the Austrian deployment.

All along both lines, the armies crept towards each other over a series of turns, as can be seen in the following series of photos.


One defining moment at this point was the French light infantry brigade gained control of the hill straddling the centre of the battlefield, by beating off an attack by Austrian uhlans and ejecting jagers from the woods.  However, what we all knew was that this battle would be won or lost on the flanks not in the centre.  It needed the cavalry to engage.


At last, the Austrian right flank crashes into the French left.


Alas, the cavalry on the other flank are still enjoying their lengthy picnic!

With opposing brigades of heavy cavalry and cuirassiers smashing into each other the honours appeared to be even.  However, the defeated Austrian were thrown back further in rout, whilst the battered French were merely disordered and withdrew slightly.  So, as it would turn out, still well placed to deal a further blow to Austria's finest.


With more units well placed, the French ensured that surviving Austrian cuirassiers faced danger from their flanks as well as from in front.  This did not bode well for the Austrian horsemen.


And so it proved to be with two Austrian units destroyed and another thrown back in rout.  The French's careful redeployment from an initial position of disadvantage was critical in denying Austrian ascendancy on this flank.


As the heavy cavalry hurtled into contact, and the French infantry approached the Austrian position, The light cavalry brigades on the near flank closed at last.


The French light cavalry commander (Lee) had handled his horse artillery well all battle to inject nervous tension into his opposing cavalry commander.  As sabres slashed it became clear that the situation was less clear cut with one victory apiece and two continuing melees. 


With the thunder of hooves to the left and right, the French infantry assaulted the Austrian position in the centre.  The job made easier for them when the three targets all failed morale checks and retired without so much as levelling their bayonets at the enemy.

However, seizing the moment and in an act of desperation, the Austrian infantry commander sent columns and lines forward to try and blunt the French attack.


In what can only be described as a whirlwind of bayonet, charges and dice, the Austrian infantry sent one unit running and smashed straight into an unsuspecting French column.  Meanwhile, further in the centre two more French infantry units were decimated.


The Austrian columns then smashed and routed the elite column of the 57th regiment, and proceeded to pulverise and rout the retiring target of its original charge.

Would this be enough to snatch victory?  Unlikely!  The Austrians had lost many commanders, artillery batteries and cavalry units.

So it was, that we called the battle concluded.  Stuart then proceeded to tally points.  Regardless of the score the photo below really shows this as a French victory from the position they had won over the Austrians


As it happened the French won with a crushing 27 - 15 victory.  Well done Surjit, Lee and Mark.


Analysis

Well played the French, especially the cavalry commanders who handled their deployment and horse artillery well.

This should have been a game that was fought quickly.  It was not.  I can only put that down to no one wanting to commit when both armies mirrored each other so much.  I believe the outcome would have been the same, and possibly without the French infantry centre being so damaged.  It was enjoyable.  The banter was top quality, Lee's tantrum was highly amusing (Ray will have something to write about that), and the action (when it came in the last 2 turns) was thrilling.

We all went home tired, but happy.


Monday, January 23, 2023

More Military Architecture

Just finished additions to the castle and walls that I recently completed - see this post.  These were more walls, roofed towers, a gatehouse and ravelins.

My aims are to maintain flexibility in the shape of the fortifications on the table, and to reflect in a slightly loose fashion the changing art of fortification in the 16th century.

With the advent and advances in artillery there was a recognition that the old style castles and city walls were vulnerable.  With the continual warfare in northern Italy during the 16th century came the development of the "trace italienne".  Essentially, this is what we would start to recognise as Vauban forts with low silhouetted bastions, hornworks, ravelins and glacis.  For example, Palmanova looks very much like a "Vaubanesque" star fort.

Map of Palmanova in 1593 by Joris Hoefnagel

Unfortunately, this new style fortification was very expensive.  So, city walls and towers were often just shortened and filled in with rubble, then bastions etc. placed at vulnerable points outside.  Ditches were both deepened and widened.

It is some of the latter that I hope to reflect.  As you can see in following image of Amiens, the city walls are basically the medieval ones.  However, dotted around the walls around are what appear to be bastions/ravelins.  The star forts are those of Henry IV's siege lines.

Siege of Amiens 1597 by Frans Hogenberg 

This can also be seen in the following painting, with what likes like a bastion in front the medieval city gates.

Henry IV at Amiens 1597, artist unknown.  Musée de Versailles

So, how have I done?

A walled town (Amiens?) with its medieval walls "modified" with aspects of the trace italienne.


And with hornworks replacing the bastion by the city gates.


I'm thinking about how best to represent the ditches that surrounded the walls and bastions, whilst still maintaining flexibility of layout.  However, this will quickly go onto the "to do" list while I finish making more 2mm roads and give in to the itch to paint some soldiers.


Friday, January 6, 2023

Small Steps

A mix of little things.

First off, three catholic gendarme units and two of stradiots to add to the 2mm French Wars of Religion collection.


Secondly, I've been playing around with handling roads at 2mm.  I've seen all sorts, including the use of coloured string.  I didn't want roads (or rivers) carved into my tiles. Plus, I like to maintain some flexibility of arrangement.  So. I've done this road leading to the town.


It's made from lolly pop sticks.  I'm working on the basis that a lot of roads were tree or hedge lined.


To stop them sliding, I've glued little waste bits of felt underneath.


Yes, they do sit a little proud. But they blend nicely and serve the purpose.  I've also found that the rounded ends help for curves, junctions, and are barely noticable in a straight line.


More roads now need to be done.... better eat more lollies!  Plus, additions to the castle have arrived.

Ever onward!