Saturday, February 26, 2022

Testing Rules and Rivoli scenario

Napoleon at the Battle of Rivoli, by Philippoteaux (Galerie des Batailles, Palace of Versailles)


For the last couple of years I've been working on a project of recreating the Battle of Rivoli, 14 January 1797.  The aim was to do this in 6mm MDF miniatures bought from Commission Figurines, using Volley and Bayonet rules to replicate army level decision making.

Brief Information about the Battle of Rivoli
In short, the French under General Bonaparte had pushed the Austrians east out of Lombardy and back onto Tyrol.  A substantial Austrian army was besieged in the city of Mantua.  During the summer and autumn months of 1796, the Austrians had attempted to lift the siege and free Mantua... without success.  This was yet another attempt under the Imperial General Alvinczy.  Bonaparte, realizing what the Austrian plan was, decided to defend at Rivoli where Joubert's division was deployed and to send Massena's division to reinforce.


You can get a more detailed brief here.


With all the figures now painted and the scenery coming together, I thought it was time to do a rough set up and see how the game looked and played.

I knew that I wanted to keep an eye on the process because I would probably want to adapt the rules slightly to better fit warfare during the Revolutionary Wars.  But, I also wanted to see if the strength and morale ratings that I had given the various units worked and provided both sides with the chance to win.  So with notebook handy in order to jot down thoughts for changes, I played the game through.

The photos will show that I did not set up a finished table, as the unkempt felt bits for woods will reveal.

The starting positions of the Austrians just as they are about to attack the French positions on the Trombalore Heights on the right.

The battlefield as seen from the south looking north.  The eastern edge of the table showing the river Adige and the Adige valley/ravine.


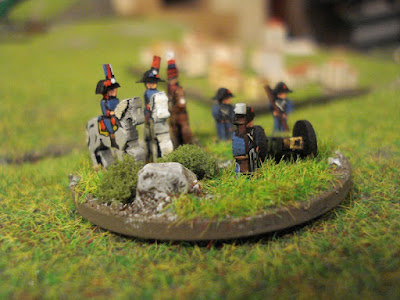
A close up of the army command stand.  Simple paint work on these charming MDF figures.  There is a surprising amount of detail (belts etc.) burnt onto the figures.

The Austrian assault on the French positions.

Some French units have been pushed off the heights, but it remains contested.  In the meantime, Another Austrian column arrives from down the Adige valley.  Plus, French reinforcements march up from the south.

Looking from east to west.  The heights remain contested, though the French prepare for a counter-attack.  The Austrian divisions are becoming exhausted.

The French counter-attack on the heights exhausts the Austrian effectiveness.  However, the effort has exhausted Joubert's division that's been fighting over the heights.  The reinforcements have arrived just in time.  The newly arrived Austrians try to break out from the Adige valley and onto the Rivoli plateau - without success.

Austrian artillery arrived on the other side of the Adige.  However, I called it a day at this point as I could see no way for the Austrians to win and I'd seen enough to draw some conclusions.


Conclusions
1. Each game turn lasts an hour.  I started the first turn at 7am.  This meant that the contest for the heights was almost finished by the time the Austrian reinforcements arrived.  If I keep the timings the same for all the other arrivals and events, I could probably make the game closer and more tense if the first turn was 8am.

2. Each division in Volley and Bayonet has an "exhaustion" level, where once the division suffers a certain percentage of losses it's ability to act offensively is impaired, and it's morale may collapse entirely.  On the heights, I had massed all of Joubert's units into one large division, but the Austrians were in smaller divisions.  This made exhaustion come faster to the Austrians bit by bit.  So... either I treat the Austrian attacking the heights as one big division OR break Joubert's into three or so smaller brigades/divisions.

3.  Each unit is given a number of hits (strength points) it can take before destroyed.  This is usually linked to the number in the unit, normally 1 strength point per 500 men.  This led to some units having only 1 or 2 strength points, and therefore easily dispatched.  For game purposes I believe that I need to make this a minimum of 3 points per infantry unit.

Generally speaking, everything else worked well.  I'll see what arises when I next play test this scenario... hopefully with more of the finished scenery to adorn it.

Thursday, February 17, 2022

Wargames Rules No 1 - They Died for Glory

The first in a little series of wargames rules that I use or have enjoyed playing.

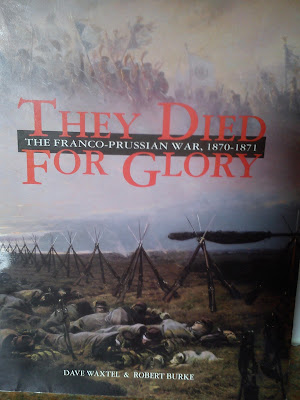
In this outing I thought I would start with what I consider my favourite ruleset.  It's not everyone's go to set for the Franco-Prussian War of 1870-71, but for me it has to be They Died for Glory by Dave Waxtel and Robert Burke.

I fell for Franco-Prussian War because I covered it at university, taught it in schools, I love the study of 19th century European history, and from a wargaming perspective am intrigued by the asymmetrical nature of the conflict - French chassepots with the small arms edge, whilst the Prussians can wheel out their superior artillery.


I won't bore you with all the game mechanics but concentrate on why I like them.

First all the order of play means that all players are involved all the time.  Basically an IGOUGO system which also allows the non-moving player to fire at a moving unit at any point in that movement.  But... you have to think because each unit can only do two things in any one turn.  So, if you fire once you can only move once.  Or move twice and not be able to fire.

This firing at a moving player's unit leads to another aspect that, for me, helps with the period feel of the rules.  If a unit suffers 4 casualties it has to go prone.  This nicely reflects the problems for attackers, think of the Prussian assault on St Privat where the guard were stalled by the hail of bullets whizzing their way and driving them down for cover.

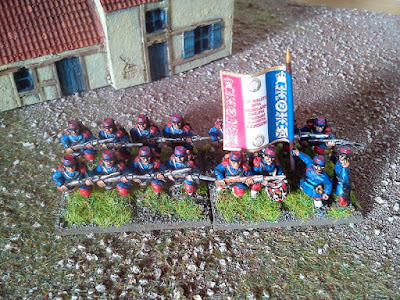
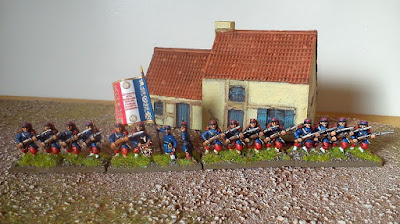
French infantry

This moves nicely into how infantry can be formed both in close and more open formations to deal with the tactical situation.  Again, reflecting our understanding of the developing tactics of the time.

The rules are bloody, and they make for a very hard game for the attacking German armies.  That is why it best to have at least 1.5:1 German to French ratio, or 2:1 if Prussian artillery is not in abundance.  Cavalry is likely to be annihilated if it tries to charge infantry, so treat with care and judiciously.

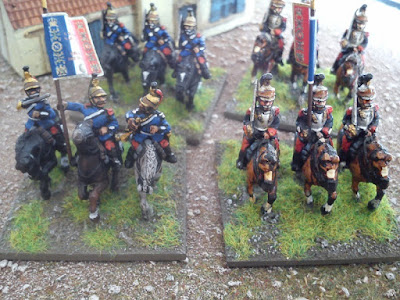
French dragoons and cuirassiers

The French are likely to lose most battles, especially if there is an absence of grenadiers/guards/zouaves who can be threw out in counter-attacks.  But this should not be seen as a negative.  Just think carefully about the victory conditions.  It might be more about the French winning if they can delay an advance for X number of turns rather than the destruction of the opposing army.

A criticism of They Died For Glory is that they don't really have command and control rules.  I've not found this a problem.  Once players are in control, they bring their own friction to the tabletop.  But a quick house rule like, any unit out of command range only has one action unless it rolls its unmodified morale or under for the second action, soon deals with that issue.

French infantry in formed firing line

The ranges and movement can be quite long (18 inches for a chassepot).  Plus, the game is designed as one unit equals a battalion.  For bigger games (especially on limited space), I reduce one unit to equal one regiment and reduce all movement and ranges by a third, and this works fine.

For links to games that I've put on for the Rejects see the links below.

Battle of Faux-Illy                             Big Lee  or  Fran and Fran pt2

Battle of Les Collines qui Bouges    Ray

Battle of Artenay-Pas-Vraiment        Big Lee  or  Ray

Give them a go.  With well contrived scenarios, I've yet to have a boring or tight game with these rules.


Friday, February 11, 2022

Battle of Pasta Castiglione, August 1796

Last weekend saw a gathering of the Rejects in Postie's Shed of War.  This time to play a game organised by me not Stuart.

This was a fairly loose interpretation of the Battle of Castiglione on 5th August 1796, with a slightly different "sauce" from the historical events.  The players had a degree of latitude in their deployment, a couple of terrain features are absent and the units on the table are not the named units that fought on the day.  Alas, the limits of my collection.

By Victor Adam


Brief Background

Napoleon and the Army of Italy had pushed the Austrians out of the northern Italian plain and were laying siege to the Austrian led fortress city of Mantua.  The imperial Field Marshall Wurmser wanted to lift the siege and relieve Mantua, thus also pushing the French back westwards along the river Po.  In order to do this Wurmser split his army in two and sent each half down each side of Lake Garda with the aim of crushing Napoleon in this pincer.

The strategic map of Lake Garda of August 1796.


Unfortunately for Wurmser, by Napoleon having the central position, the western army under Quasdanovich was defeated and fell back towards the Tyrol.  This meant that the revolutionary army could now face Wurmser as he approached from the east.

The Forces

The army lists are as follows:

Austrian

Commander in Chief - FML Wurmser


French

Commander in Chief – General Buonaparte


Rating


Rating

Division General Melas

Line


Division – General Massena

Vet

IR29 Kerpen

Line


6th Demi Brigade

Line

IR25 Brechainville

Line


75th Demi Brigade

Line

IR14 Klebek

Line


85th Demi Brigade

Conscript

IR8 Huff

Line


57th Demi Brigade

Vet

Artillery


Carabiniers of 4th Legere

Vet

Division  - General Davidovich

Vet


Artillery


Szluiner Grenzers

Line


Division – General Augereau

Vet

IR24 Preiss

Vet


4th Demi Brigade

Line

IR4 Deutschmeister

Line


69th Demi Brigade

Line

IR13 Reisky

Line


14th Demi Brigade

Line

Artillery


19th Demi Brigade

Line

Division – Sebottendorf

Line


51st Demi Brigade

Line

Illyrischer Grenzers

Line


12th Demi Brigade

Line

IR51 Splenyi

Line


Grenadiers

Elite

IR43 Thurn

Line


Artillery


IR27 Strassoldo

Vet


Cavalry Division – Marmont

Vet

Artillery


5th Dragoons

Vet

Cavalry Division – General Placzek

Vet


20th Dragoons

Line

2nd Hussars

Vet


10th Chasseurs a Cheval

Vet

Stabsdragoner

Vet


Reserve – General Despinoy

Line

Reserves


5th Demi Brigade

Line

Carlstadter Sharpshooters

Vet


Legion d’Allobroges

Conscript

IR 49 Pellegrini

line


In order to provide a little fog of war, I have kept from the players the exact quality rating of each unit.  In fact, I may have been slightly "ambiguous" here and there.  Plus, casualties will not be marked on the tabletop units.  I will record them.

The Players

Austrians
Wurmser/Melas - Ray
Davidovich - Lee
Sebottendorf and Placzek - Surjit

French
Napoleon/Massena - Mark
Augereau and Marmont - Postie

Deployment

The table was set up based on this rough hand drawn map. 

Umpire's map of the Battle of Castiglione


Austrian
Melas Division could deploy in a box A1 to C3
Davidovich in B2 to C6
Sebottendorf in B6-B7, C7 to D8
Placzek and reserves could be deployed anywhere along A row after the French deployment.

French
Massena could deploy in squares F1-F3
Augereau in F3 to F5
Marmont in squares F7 to F9
The reserves could be deployed anywhere along the F row after the Austrian reserves had been deployed.

Player Briefings

These were the briefings given to each side.

French Briefing

An Austrian attempt to relieve the besieged city of Mantua by a pincer movement down both sides of Lake Garda has been weakened.  Thankfully you have been able to throw Quasdanovich’s western wing back to the north in disarray at the Battle of Lonato.
However, Wurmser’s army threatens to now push you back west towards Lombardy and Piedmont.
You have had to lift the siege at Mantua to deal with the Austrians.
You have sent orders to Fiorella to march from the southeast to smash the Austrian rear.
You must push back the Austrians.  If you capture the heights and Solferino you can cut off Wurmser’s line of communication, and hopefully force him back into the Tyrol.
Your line of communication is the road west to Castiglione.

Austrian Briefing

You have heard that Quasdanovich’s army on the western arm of the pincer around Lake Garda has been pushed back.
In order to complete the relief of the besieged city of Mantua, you need to hold the French and force them west and away from Mantua.
Your line of communication is toward Pescheria.  If things go badly a retreat towards Mantua could spell disaster as you may find your army trapped there.
If you can cut the French line of communication back to Castiglione this may eject the French and force them towards Piedmont and west.
You are aware that French troops may lie to the south or southeast, but no contact has been made to determine their exact whereabouts.

Basically, the winner is determined by who can hold their line of communication and control Solferino and the heights.

The Battle

For a better report of the battle itself have a look at Lee's blog and Ray's blog.

In the meantime here are some truly awful photos of the progression of the troop positions.

After deployment.  The troops are arrayed.  Most of the fighting will be down this end and in the centre.
You can just see Postie and Mark doing some serious chin rubbing as they ponder.


The French line on the left advances.


The opponents start moving into musketry range.


At the far (southern) end of the table Austrian and French cavalry clash.  The Austrians are the immediate winners, which quickly evaporates once their hussar regiment pursues the French off the table.


Postie has been making slow progress in the centre as Lee continues to backstep his division.  However, the situation close by is very much in the balance.


The worst photo!  Mark cracks open Ray's command.  However, even though the Austrians are obliged to retreat, the French soldiery is too exhausted to follow up.  The Austrians have won a tactical victory but suffered a strategic reversal.


Analysis

Essentially the two armies lined up as follows:

In the north around Solferino:  Melas (Ray) vs Massena (Mark), with two units from Augereau.
In the centre:  Davidovich (Lee)  vs Augereau (Postie)
In the south:  Sebottendorf and Placzek (Surjit)  vs  Marmont (Postie)

In the north.
Melas lost 45.3% of his effectives whilst Massena lost 40.3%.
This actually reflects nicely the close run nature of the fighting that took place in this part of the tabletop.  To reinforce this, both sides captured a standard from the other - IR8 Huff and 85th demi-brigade being the careless units.

In the centre.
Davidovich lost 23.9% of his men.  Augereau lost 33.3% of his troops.
This probably reflects the Austrian being able to contain and inflict losses on a slightly less coordinated assault by the French.  Nonetheless, French losses look worse until one considers that one demi-brigade alone (the 51st) suffered 75% loss of effectiveness.  Plus, they captured the standard of IR49 Pellegrini.

In the south.
Sebottendorf did nothing and lost nothing.  Placzek lost 66% after the hussars chased French dragoons off the table.  However, Marmont's 43% loss needs to also take into account their now reduced ability to contain Sebottendorf's division.

Where the battle mattered most, on the heights and towards Solferino, it was a close engagement and fortune swung back and forth.  The Austrians just held on, but the French were drawing alarmingly close.

All participants played with great thought and reflection.  The Austrians played to their strength of keeping a line and withdrawing when needed.  The French were rewarded for aggression in the north, but were perhaps a little too cautious in the centre.

As umpire, I enjoyed it.

To get a player's perspective visit Big Lee and/or Ray's Don't Throw a One blog for his report on the game.