I fancied getting the 28mm French Revolutionary War (FRW) boys out. So, I thought that I would go for a quick game using One War Wargames (OHW) scenario 1.... , but using my FRW rules.
The Forces
The French: 4 units of line infantry, 1 skirmish light infantry and 1 unit of dragoons.
The Austrians: 3 units of line infantry, 2 artillery (one light, one medium) and 1 unit of dragoons.
Deployment
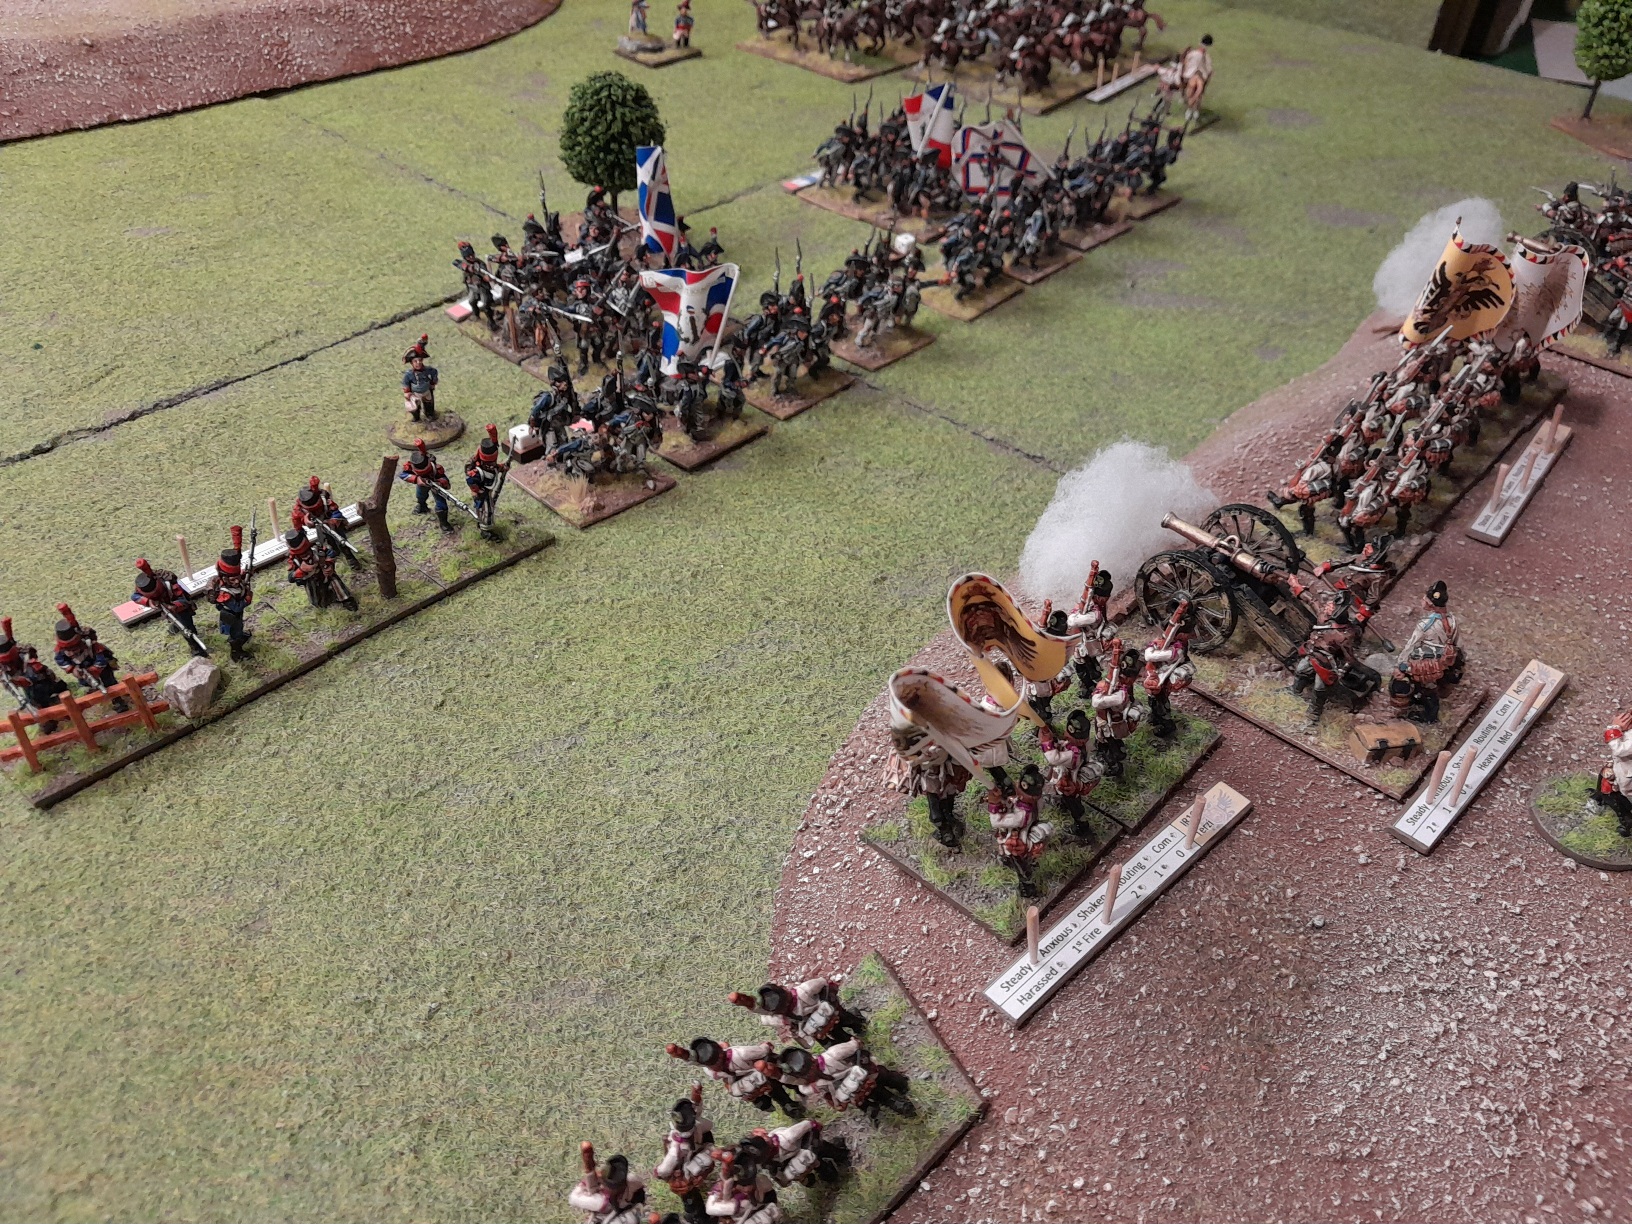
The Austrian forces, closest to the camera, appear to be deployed initially for a defensive posture. Perhaps hoping to make good use of their artillery advantage.
The French look set to advance quickly and engage.
The Battle
The French quickly advance having decided to lead with infantry in open order. However, the Austrians clearly decided to take advantage of their artillery and set up a defensive position on the hill. Throwing only their dragoons forward to occupy the French cavalry.
At the earliest opportunity, the Austrian horse charge their counterparts. However, the French dragoons have enough time to counter-charge.
Meanwhile, the French infantry continue their advance into a storm of shot.
The horsemen engage in a ferocious struggle with little quarter being given. Without any immediate result, neither side is yet willing to yield.
Desultory shooting from both sides, especially the Austrian gunners.
The French are now made to realise the error of their incautious advance when the Austrian line charge off the hill to catch their opponents in open order.
The light infantry on the French left are quickly overwhelmed and retire badly shaken.
Likewise, the formed Austrian line overrun the more vulnerable French who fallback shaken but not broken. Leaving the second line open to an Austrian breakthrough charge.
Amidst the disaster unfolding on the French centre and right, the French dragoons give the Austrian horse a lesson in how to use a sabre.
 |
| The situation after the initial melees have been resolved. |
Desperate to restore some order and discipline to their shaken infantry, the French commander attempts to start recovering morale. However, he only succeeds in causing a much needed regiment to retire further.
However, the formed Gallic regiments hold their own...
... and throw the Austrians back in disarray and badly mauled.
 |
| Austrians forced to retire back to the hill in some disorder. |
With the rest of the line now back on the hill, the Austrian left had no option but to fallback to the hill as well.
 |
| The now exposed Austrian regiment on the left about to withdraw to safety on the hill. |
 |
| The situation after the second set of melees. |
In a bid to regain the initiative, the Austrian commander attempted to rally the dragoons...
... and failed!
With them running off, this caused the Grenzers to be carried off the field of battle as well.
 |
| The Grenzers pondering their situation just before they take flight. |
The French were also struggling to bring some of their units back into line. Another retreat away from enemy.
... and a forced retirement when the Austrian gunners opened up again.
Nonetheless, the Austrian right flank was now starting to look exposed.
... especially with the French dragoons able to advance towards it unopposed.
With over a third of their forces scattered or destroyed, the Austrians faced an army morale check... and marginally failed, forcing a withdrawal in good order.
A French victory. This certainly did not seem likely earlier in the battle.
 |
| French line advancing to occupy the now vacated hill. |
I thought the Austrians had victory in their grasp. If only their gunnery was more accurate and deadly! Perhaps they should have stayed on the hill to receive the French with terrain advantage. However, I'm sure that the Austrians would have been facing columns not open order troops.
It was good to get these models out. I feel that I may work through more OHW scenarios to see how they work as games using my own FRW rules.


Neat little action and lovely to see your 28mm FRW armies out on maneuvers. Sometimes I find that the small, OHW scenarios play with more balance when using OHW-like attritional rules. Good to see that your rules worked equally well. I don’t often see a solo game from you. I think I even spied the bayonetless Austrian battalion.
ReplyDeleteYes you did see the bayonetless Austrians in action. Courtesy of a very generous soul.
DeleteI enjoyed the game and will try out some of the other scenarios in due course.
Good old ‘OHW’ scenarios :-) Enjoyed, thanks. I wish the OHW rules had included just another page or two to give us some command and morale rules.
ReplyDeleteGlad you enjoyed it Norm. I definitely understand your point of view about command and morale.
DeleteGreat looking game with equally great looking figures, Richard! I've not played the FR period - other than the Egyptian Campaign, using Rebels & Patriots. I like the period though.
ReplyDeleteThank you Dean.
DeleteGreat little encounter, the French somehow turning around what seemed a certain defeat
ReplyDeleteThanks Neil. The Austrians couldn't quite press their advantage.
DeletePerhaps if that Austrian battalion had attached bayonets they might have won. I don't know what it is about the Austrians as on paper they aren't that bad, but you never seem to read of many successes on their own. Very much like their historical counterparts.
ReplyDeleteLOL.
DeleteIf I was a betting man I would have put my money on the Austrians with their artillery and positional advantage... though the latter was perhaps squandered.
Great stuff Richard! Having seen Steve J (and others) using OHW scenarios on a regular basis, and having a soft copy of the book myself, I really must get around to playing a few solo games too!
ReplyDeleteYou should!
DeleteThanks Keith. I've just started dipping my toes into them. So far, so good.
DeleteAgree, really great looking game sir!
ReplyDeleteWarm regards
Thank you Michal. Kind of you to say so.
DeleteGreat looking game , nice to see your lovely 28mm revolutionary troops, same old story for the Austrians, should have /could have! I find the OHW scenarios a great resource!
ReplyDeleteBest Iain
Excellent battle report. I thought the Austrians had it half way through. It certainly looked like an exciting game. Its good top see these figures out on the table again.
ReplyDeleteCheers Lee. So did I.
DeleteI enjoyed having these figures out. I think I may get them in the shed of war later in the year.
This is great and rather inspiring - shows how a good and interesting game can be had from the most simple setup. Figures look great too, and the OHW scenarios are all good, it seems. I think many players have linked-up several scenarios to make a 'mini-campaign' - for example perhaps the loser of Scenario 1 falls back to a prepared defensive position, for which there is bound to be another suitable OHW scenario..
ReplyDeleteThanks David. Glad you liked it. The book has suggestions for linking scenarios to create a narrative campaign. The scenarios do seem to cover almost every situation.
DeleteGreat looking game Rich. The poor Austrians never seem to have any luck do they?
ReplyDeleteCheers Ray.
Delete