Saturday, May 28, 2022

Wargames Rules No 3 - Volley and Bayonet

I have to confess that when I find a set of rules that I like, I do tend to stick with them.  And for the job that they do, I think Volley and Bayonet works.  But having said that, except recently (see here), I haven't played these for... a decade and more!  Hopefully the Rivoli project will radically alter that state of affairs.  However, it perhaps says something about the mechanics that there is something that always draws me back.


This choice is quite unusual for me, as I tend to choose rules that are specific to the tight period or conflict, for example They Died for Glory for FPW.  Whereas, Volley and Bayonet is a broad set to cover the horse and musket era from c.1700 to c.1870.  In this respect, I believe it might be the thing that scratches that itch to play the big battle rather than a part of it.

Another thing of note are the design notes.  You may not agree with them all, but Frank Chadwick certainly makes clear the rationale for the systems in Volley and Bayonet.  Have a look here.

Scale

A jump that needs to be made in player imagination is that one infantry and cavalry base (typically 3 inches by 3 inches for Napoleonics and after) represents a regiment or brigade.  So what you are playing with are formations.  Not individual units.  The player does not even worry about line or column etc..  The assumption is that the brigade and regiment commanders will deal with that stuff.  You are the general commanding the army, and that is your only concern.  So "like" number one is the player is the commander in chief... not the colonel or sergeant!

3 French divisions defend against 3 Austrian.


Command and Control

There is none!  

Not strictly true... there is a command radius between division commanders and their brigades. To be out of this really inhibits forward movement and can leave a brigade disordered if it does. When a unit is disordered it is one bad decision away from routing and/or being permanently disordered.  It actually makes a player conscious of command and control issues without elaborate mechanics having to be employed.


Movement

Movement is ENORMOUS.  If you play the full scale an infantry brigade can move 16 inches; heavy cavalry up to 20 inches.  But it works!  Remember this is truly grand tactical and it has to be appreciated that one turn equals one hour.  However, terrain, manoeuvring, and the presence of the enemy can soon limit those massive moves.  Plus, fast unsupported advances can invariably lead to unwelcome outcomes.

You can scale down to half move rates and missile range - especially good if you choose to halve the size of the bases.


Morale and Division Exhaustion

One of the things that I like best is the division exhaustion rules.  Each unit has a strength value which can degrade with losses.  Typically a Napoleonic brigade (one unit) will have a strength of 4-6 (1 strength point equates to c.500 men).  The units in a division contribute their strength to the Division Exhaustion.  So, when a division typically suffers 50% loss of strength points across its units, the division must take a test to see if its morale collapses.  As you can imagine, this is not good news if it happens.  

The point score of the Division Exhaustion test can be adjusted to reflect the quality or resilience of the division - say down to 40% losses for a fragile division; up to 60%, for a high morale, very resilient division.  So, not only does which unit have its morale rating, but the division exhaustion level can be applied to this as well.


In short, these rules are simple but on greater reflection are actually quite nuanced.  The mechanics do allow for the forms of fighting in the 18th century, and also later with the advent of rifled small arms and artillery.

I just need to play them more!


Wednesday, May 11, 2022

Save the Factory - Aerial Dogfight

The Rejects got together for their regular Paint and Chat session via Zoom.  But this time we engaged in some dogfighting instead of painting.

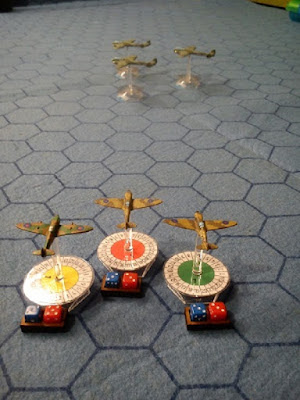
Lee, Ian and Steve represented the RAF in their Spitfires.  Meanwhile, the Luftwaffe were piloted by David and Ray.  The German bombers were controlled by the umpire.

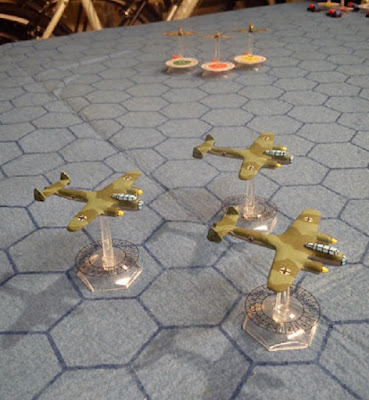
The starting positions were that the RAF were vectored in on some raiding DO17s with the mission to stop them from reaching the beer factory.  The BF109 top cover were close at hand, but could appear from any of the yellow markers.

All pilots started as experienced.  Their level could rise by getting kills.  However, it could drop if killed.  Killed pilots would reappear at one of the yellow markers.

The winners would be individual with the most points (2 per kill) and the side with the most points.

The starting positions.

Starting position as seen from behind the Spitfires.

...and seen from the DO17s.

At this point my ability to umpire and take photos utterly collapsed.

What I can say is that poor Ian kept on getting in the way of teutonic weaponry and was shot down twice.  Once by a bomber and another time by Ray.

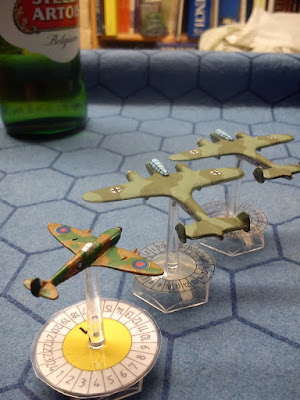
By the end of the game the dogfighting was intense with Lee and a bomber damaged.

Final positions of the combatants, except one...

Steve had managed to leave the dogfight and concentrate on the raiding DO17s.  He successfully shot one down, but failed to score on the others before they dropped their bombs on the Stella Artois Beer Factory.

Steve desperately trying, but rolling bad dice.

An enjoyable time seemed to be had by all.

With 2 points for a kill and modifiers according to finishing skill level, Ray (Luftwaffe) and Steve (RAF) were joint first with 3 points each.

Ian was last with -1 !!

Overall, the Luftwaffe won with 3 points to 2.  The German fighters did their job of protecting the bombers.


Sunday, May 1, 2022

The Catholic Army on Parade

The Catholic army has been completed and here is the result.  All figures are from Irregular Miniatures' 2mm ranges.

This is the full army set in array.  The gens d'armes forming the first line with French pike and shot units and a Spanish tercio in the second and the Swiss pike in the third line behind some artillery.  The town is made from the excellent 2mm buildings from Brigade Models.  They are from their Mediterranean range.  I have some of the medieval/renaissance buildings for this period waiting to be painted.


A closer shot of the lines.


A view from the rear ranks.


The Spanish tercio.  I'm not sure that I am happy with this.  For impact, I'm inclined to make the pike block larger.  I'll ponder on this.


The photo is more blurred than I thought, sorry.  Here is a birds eye view with a tape measure down to give a sense of scale.  Basically the gens d'armes line is 60cm long.


A closer view of the rear of two of the French pike and shot regiments.  
The French constantly struggled to find enough pikemen, so often had units with a large proportion of shot.  The Huguenot foot often had no pike at all!
These two represent the Catholic/Royalist old bands or regiments and have a proportion of 2:1 - essentially what was aimed at.  The raised Catholic regiments and bands often had a ratio of 1:1.


Here's a photo of the two foot units with a 15mm French Franco-Prussian War unit behind it for scale comparison.


And... the same units with a tape measure as well.


This picture shows three units of gens d'armes as viewed from behind.


I should at this point say that my mustering of both Catholic and Huguenot armies are based on the Battle of Coutras, 20th October 1587, with the express intention of using that as a foundation from which to expand.

My army list for the Catholic army at Coutras is not perfect but this is as best as I can make out.

Commander:  Ann, Duc de Joyeuse

Joyeuse's Gens d'armes
Lavardin's Gens d'armes
Montigny's Gens d'armes
Mercurio's Stradiots
Picardy Pike and Shot Regt.
Tiercellin Pike and Shot Regt.
Cluseau Pike and Shot Regt.
Verduissant Pike and Shot Regt.

Now to get on with Henri of Navarre's Huguenot army.


Most Popular Posts